
With the desire to have fast profiling, low cost, and colour accuracy being a bit of an oxymoron, an alternative method is needed to increase the colour accuracy of faster, and cheaper, colourimeter probes.
- ColourSpace INF/XPT/PRO/CAL/LTE & HTX/HTP/HTL & DPS/ZRO
- Improved Colourimeter/Tristimulus accuracy
- FCMM, FCVM, & MPVM options
- Unique post measurement application
Overview
Understanding the basics
Probe Matching is performed by calibrating, or matching, a colourimeter based probe to a Spectrometer on the same display.
In this way the colourimeter is accurately matched to the Spectrometer for the specific display to be profiled, producing more accurate results.
Uniquely, there are three different methods available for probe matching - ColourSpace's unique 4 Colour Volumetric Matching (FCVM), and Multi-point Volumetric Matching (MPVM), with the option to force the use of the traditional simple matrix method (FCMM).
Note: The term Spectroradiometer is actually the correct term to use for a Spectro probe, but as all Spectroradiometers have a Spectrometer as their base, the term Spectrometer is often used along with Spectro as shorthand.
Probe Matching Benefits
Using probe matching, the speed benefits of a colourimeter, and more importantly the lower-light reading capabilities, can be employed while simultaneously enjoying the greater accuracy of a Spectrometer.
Probe Matching using the two Matrix Methods, FCVM and FCMM, can be performed with any Tristimulus probe supported by the ColourSpace license in use, combined with any Spectro - directly supported or not.
Using Spectro probes directly supported by the ColourSpace license in use is obviously the simplest approach, but any Spectro can be used, as all that is required is to manually enter the four RGBW measurement values into the ColourSpace Probe match menu, using the Spectro's own software as provided by the probe manufacturer.
Note: To manually enter Spectro values existing Probe Match data needs to be overwritten, so the use of Copy to make a new file is recommended.
When performing Probe Matching manually the correct RGBW colour patches must be used, matching those measured by the Tristimulus probe
- 242 8-bit for Full Range
- 224 8-bit for Legal/Extended Range
ColourSpace's unique MPVM (Multi-Point Volumetric Matching) can only be performed with Spectros that are directly supported by ColourSpace.
Probe Matching Procedure
how to probe match with ColourSpace
While probe matching can often be performed, and used, within a given tristimulus probe, all such matching will be based on the standard Four Colour Matrix Method (FCMM), which has accuracy limitations with modern display technologies, and additionally applies the probe matching to all direct measurements, preventing different probe match configurations to be compared within ColourSpace.
Consequently, all Probe Matching should be performed within ColourSpace, maintaining ultimate flexibility and accuracy.

More importantly, all ColourSpace Probe Matching is uniquely a Post-Profiling application, meaning any saved profile data can have different probe matching configurations applied as desired, at any time after any measurements have been performed.
This post-profiling approach to Probe Matching is totally unique to ColourSpace, and provides a level of control unmatched by any alternative calibration system.
Also note that is is possible to mix probe match types for Probe Matching, matching a Matrix to a Volumetric Profile, or vice versa, with the Volumetric Profile deconstructed into a Matrix.
Probe Setup
Before performing Probe Matching, any Tristimulus probe should ideally have any internal matching matrices removed/disabled, including Matrices/Correlation Files/EDRs, etc. The Tristimulus needs to be un-corrected, using the probe's default filter response.
Display Setup
With most displays it is usual to set them to their native, uncalibrated state for probe matching. However, this is not strictly necessary, and often having the display roughly set to the desired target colour space can be beneficial for Probe Matching, as it limits possible volumetric errors within the probe match.
And with very wide gamut displays, and tristimulus probes with less than ideal RGB filters that do not match well the CIE observer, deliberately putting the display into a smaller gamut colour space for probe matching can be necessary. The colour space used doesn't have to be a real colour space such as Rec709, just a colour space that is smaller than the display's native wide gamut capabilities. That will ensure the colourimeter is within its CIE capabilities, and generate a better probe match.
Remember to put the monitor back into its native colour space before doing calibration.
Probe Alignment
For a Matrix based probe match, the most accurate way to align a tristimulus with a spectro is to measure the required 4 colour patches - RGBW for FCVM/FCMM probe matching - on the exact same spot on the screen, one probe after the other, aligning the two probes to have the same field of view (measurement area), as well as the same inclination to the screen.
Attempting to read the same patch with two probe simultaneously will not work as well, due to measuring different areas of the screen, or different angles to the screen if attempting to read the same screen area, which will almost certainly introduce polarization errors. Additionally, tristimulus probes will always read far faster than spectros, causing potential timing issues.
With ColourSpace two (or more) probes can be connected simultaneously, through the use of opening multiple Profiling Windows, enabling different probes to be warming-up, and for them to be quickly switched between as needed.
Also uniquely, ColourSpace takes three readings for each of the 4 colours, averaging the readings to gain the best possible probe match accuracy.
Simultaneous Probe Matching
Simultaneous Probe Matching workflow can be performed using ColourSpace's Secondary Execution capability to simultaneously control a Spectro and Tristimulus probe for Probe Matching.
A user developed example of simultaneous probe matching can be found on the Addons page of the website, within the Additions tab.
Probe Match Verification
Verifying the accuracy of a probe match
With ColourSpace's unique Post-Profiling application of Probe Matching, there is really no need for any separate verification of the probe match performed, as every measurement you take with ColourSpace can be viewed within all the available graphs with/without probe matching applied, instantly providing a visual reference to the Probe Match application.
This very uniquely means possible areas of probe match error can be instantly seen after performing a volumetric profile, and comparing the without Probe Match to the Probe Match being applied.
It obviously also means different probe match configurations can be compared to each other.
Tristimulus to Spectro Verification
An alternative verification is to compare the Tristimulus readings, with Probe Match active, directly to the Spectro's readings.
With ColourSpace this is very simple, as you can simply extract a User Colour Space from the spectro readings, either by manually copying the Probe Match readings or into a new target colour space, or via the Extract function within the library, and directly compare the tristimulus readings using the ColourSpace graphs using the extracted colour space as the target.
- Open the Spectro probe match file within the Probe Matching window, and copy the RGBW values into a new User Colour Space with the display's correct EOTF value
- Alternatively, use the RGBW patches used for Probe Matching (242 8-bit for Full Range, 224 for Legal/Extended Range) to measure all 4 patches with the spectro
- Save the profile with a suitable name
- In the Library use Modify to Extract a User ColourSpace from the saved profile
(If you intend to use the colour space to verify more than the 4 RGBW patches remember to set the correct EOTF within the colour space) - Set the new User Colour Space as the Target Gamut/EOTF in the Settings window
- Measure any patch set with the tristimulus, with the same 4 RGBW patches included as used for the Probe Match
- Use Probe Matching Active to compare the tristimulus readings with the spectro generated Target colour space

Although only the 4 RGBW patches used for the probe matching, with the same exact RGB values, will provide a direct verification of the Probe Match, using larger profiles, such as a Grey & Primary Ramp characterisation can be used to quickly show the probe match result, and visually show any inconsistencies.
Alternative Probe Match Verification
An alternative Probe Match Verification is to use the Remote Control capabilities of ColourSpace, and use two Profiling Windows to simultaneously measure the same patches with the Spectro and the Tristimulus, and directly compare the two profile graph sets.
4 Colour Matching - Simple & Volumetric
The traditional 4 Colour Matrix Method (FCMM) is the default for most probe matching, and is used when any matching is performed within a tristimulus probe itself. 4 Colour Volumetric Matching (FCVM) uses the same 4 colour measurements, but provides a greater level of accuracy on some modern displays technologies, such as WOLEDs, and is unique to ColourSpace. The choice of of FCVM or FCMM matching can be set via the Force simple matrix match option. When enabled, the traditional FCMM option is used.
- Attach the first (colourimeter) probe, selecting standard probe parameters as required from Probe Options
(A None/Bypass/Default pre-set within the colourimeter should be used, not a display specific matrix pre-set) - Select the Probe Matching option, and press New
- Enter a unique descriptive name and press OK
(Use a name that includes the display and probe details) - Place the probe on the patch window and press Measure All
(The patch window will cycle R, G, B and W patches, and save the probe/display measurement data) - Change the probe to the second (spectro) probe, and repeat the process
(Spectro's do not use matrix pre-sets)
The order the probes are measured in is not important, and you can measure the spectro first, with the colourimeter second.
- If using a separate patch window, not controlled via ColourSpace, use the RGBW << Measure buttons in-turn
(Each patch colour should be based on a value of 242 8-bit for Full Range (equivalent values for alternative bit depths, and different ranges), to match the ColourSpace generated patches, although this is not critical so long as the same exact patch values are used for both probes) - With the probe placed on a patch of the correct matching colour press the relevant << Measure button to take a measurement
- Alternatively, manually enter the Yxy values
Regardless of the procedure used to take the probe measurements, the profile files are used in the same way.
- Select the spectro Reference Probe/Display Preset file from the Probe Matching lower drop-down menu
- Select the colourimeter Active Probe/Display Data file from the upper drop-down menu
- The colourimeter measurements can now be corrected to match the spectro using the Probe Matching Active tick box with Graph Options, Processing
Multi-Point Volumetric Matching
Using ColourSpace's unique MPVM option
Multi-Point Volumetric Matching (MPVM) is totally unique to ColourSpace, and as the name suggests uses more than the 4 colour measurements of the above 4 Colour matrix methods. This is aimed at displays that have a serious non-linear volumetric colour response, with spectral colour variations throughout the display's brightness and colour range.
The fundamental difference with Multi-Point Volumetric Matching is that the entire display's colour volume is profiled to perform the match, not just 4 bright patches.
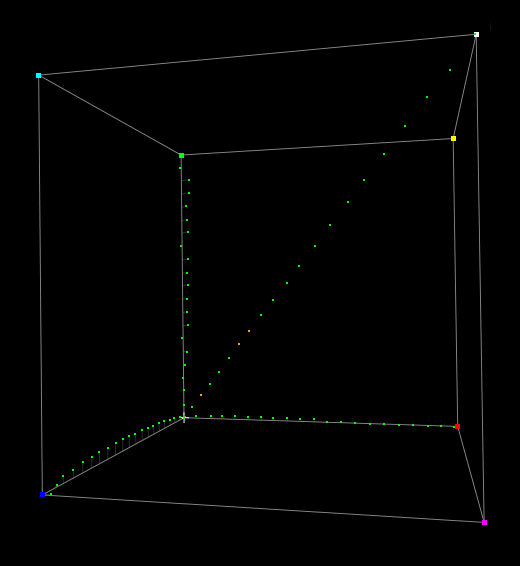
- For Multi-Point Volumetric Matching a profile really needs to be cube based
(Multi-Point Volumetric Matching will work best with uniform profiles, not random ones) - Best results will be attained when the display peak white is set to be close to the target peak white
(For example, 100 nits for SDR calibration) - The profile needs to be a large volumetric cube based profile
- Profile the display with each probe in-turn as normal, with no probes selected within the Probe Matching, Configure option
(Also use a None/Bypass/Default pre-set within the colourimeter, not a display specific matrix pre-set) - After profiling both probes, open the Space Management library, and use Modify, Extract BPD to convert the profiles into Probe Matching files
(Use a descriptive name for the extracted BPD file) - If the Extracted .bpd file is not directly saved into the Probe Match folder location (MCGD folder), they can be Imported via the Configure Matching menu
The probe matching files can now be selected within the Probe Matching option, exactly as for 4 Colour Volumetric Matching.
Low Light Issues
If either of the probes has problems measuring the low-light levels of the display when performing profiling for MPVM probe matching, modify the patch set used to remove any points that cause probe measurement issues, ideally maintaining an equal cube based set of points, so deleting patches equally throughout the cube volume.
There are numerous ways to remove such points, such as exporting the patch set as a .csv file, and editing it, or using the Virtual Probe to generate a profile that can be used for Profiling via the Current Point Info Selection option within Characterisation, and using the Point Info window to manually delete unwanted points.
Application of Probe Matching
With the unique Post-Profiling application of probe matching within ColourSpace, any saved profile can have any probe matching applied as desired, at any time after profiling has been performed.
When performing Manual Measure adjustments probe matching needs to be performed on the live measurements, not post-profiling.
With ColourSpace, probe matching for both pre-and-post profiling is equally applicable.
For any probe matching process - Manual Measure, or Post-Profiling - simply set the Probe Matching options within the Probe Options menu, and enable matching when required via Probe Matching Active within Graph Options. Any probe readings, both live measurements and saved profiles, can therefore be displayed with or without probe matching applied, as desired.
When a profile is saved into the library, the status of Probe Matching Active is applied to the saved profile. It is therefore recommended to use a profile name that states if Probe Matching was active, or not, when the profile was saved, to prevent double application of Probe Matching.
If Probe Matching is being used, the profile MUST be saved with Probe Matching Active for use with LUT Generation.
Alternative Probe Matching Applications
In addition to the above standard uses for Probe Matching, the unique capabilities of ColourSpace all allow for some alternative uses, that cannot be replicated with other calibration systems.
One very powerful application is the ability to extend the Dynamic Range of any probe, without negatively affecting its low-light capabilities. This approach is defined in detail within the Extend Probe Dynamic Range page, where it is explained that Probe Matching, in combination with a cheap ND Filter, can be used to extend the dynamic range of any probe.
The same approach can equally be applied, without the ND Filter, to enable two probes to be used within a single calibration profile, seamlessly concatenating the alternate measurements.


